CIP browseable protocol
There are two Connection types that utilize the CIP protocol. The Ethernet/IP – CIP connection and the Ethernet/IP – CIP Browsable. The former is made for performance and the latter is made for flexibility and is the subject of this article.
The connection is browsable, this means that it will scan for variables on the PLC and display them to the user. This contrasts with non-browsable connection that rely on the user to type in the correct address for each Input and Output.
Setting up the connection
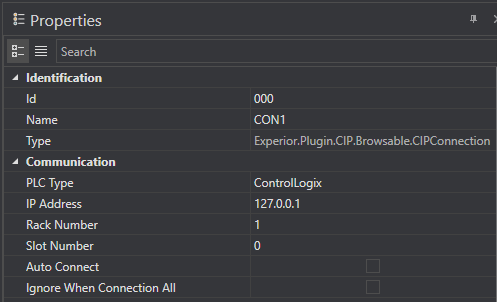
First the connection needs to be created, then it must be configured. This includes settings the PLC type, the Rack Number, Slot number and the IP address of the PLC that the connection needs to communicate with:
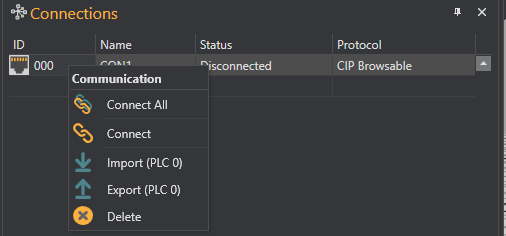
Next step is to connect to the PLC. Right click the connection in the Connections window and click Connect:
The connection will request a variable list as soon as it connects with the PLC. Once the connection has the variable list it’s ready to be used. Please note that the variable list will only be available while the connection to the PLC is maintained.
Using the connection
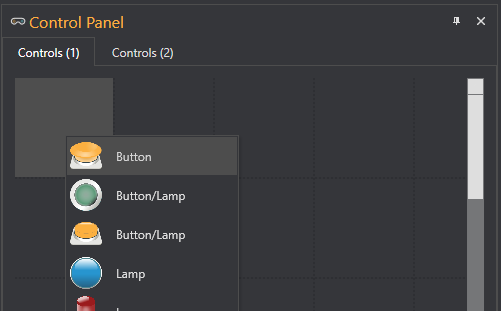
The next step is to use the connection. This can be done by adding a button to the control panel. To do this select a square in the Control panel grid, right click and select a Button from the context menu:
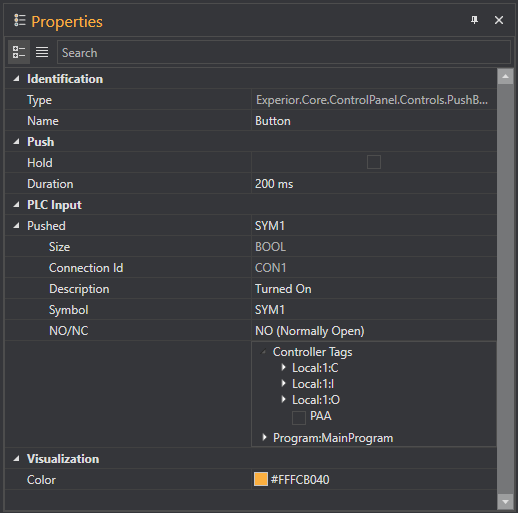
Select the newly created button and expand the Pushed entry in the Properties window. Make sure that the connection ID property is the Browsable CIP Connection that was created earlier:
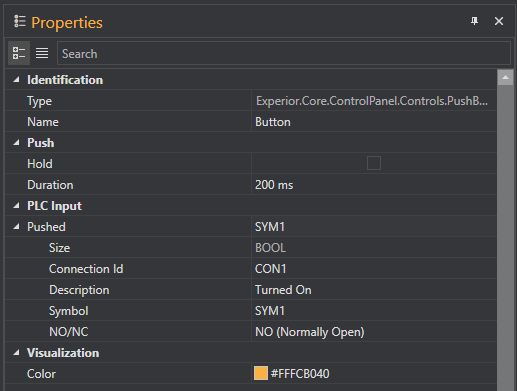
This will add the variable list. Locate a variable in that is of the BOOL type and check the checkbox. The Pushed Output of the button is now linked to the selected variable. If the button is pressed then the value of the variable in the PLC will be true, otherwise if will be false.
