Menus
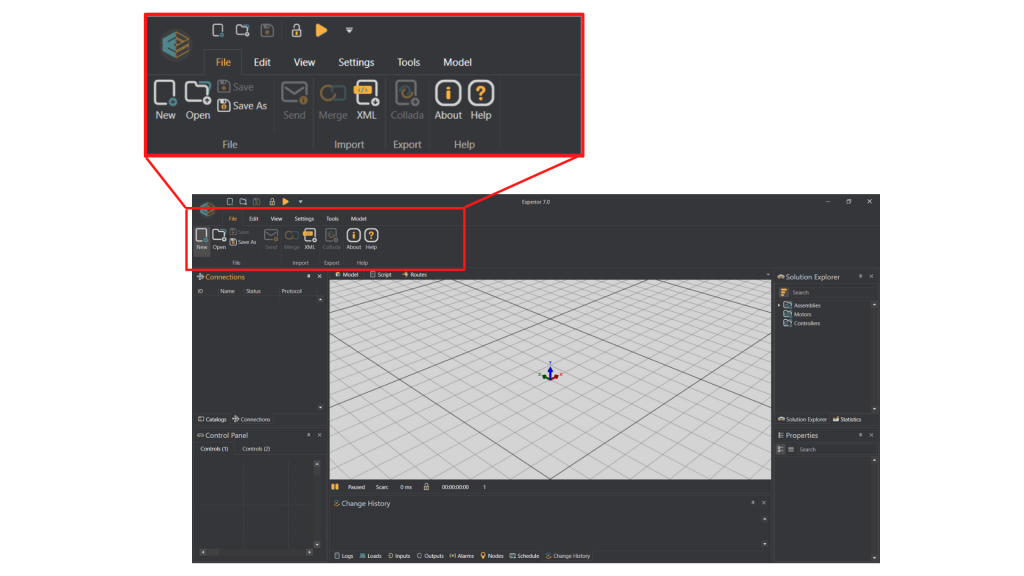
1. Files
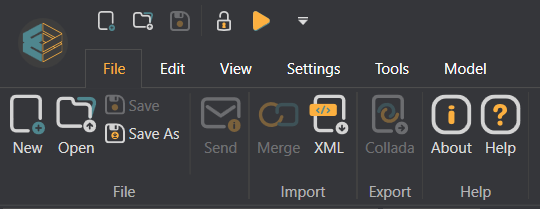
NEW: Create a new file
OPEN: Open an already existing file
SAVE: Save your model
SAVE AS: Choose a name and location for your saved file
MERGE: Merge two different models
XML: Import an XML file if its format can be used in Experior
COLLADA: Export the model graphics as a Collada file (.dae)
ABOUT: Shows a Popup with the details of the catalogues and plugins you have loaded
HELP: Sends you to the Experior help page
2. Edit
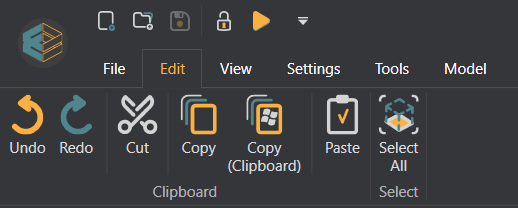
UNDO: Undo your latest action
REDO: Reverse the undo
CUT: Cut out a part of the model to paste elsewhere
COPY: Copy part of the model. However it does not move to the clipboard so this only works if you want to copy and paste a part of the model within the same Experior window
COPY (CLIPBOARD): Places the copy on to your clipboard allowing you to copy and paste between separate Experior windows
PASTE: Insert what you copied
SELECT ALL: Select all assemblies
3. View

WINDOWS: Choose which windows you want to be displayed in your Experior interface
RESET: Resets the window layout to the default
BACKGROUND: Choose the color of the ‘sky’ in the models background
ASSEMBLY: Choose the color of your models components as well as the color they display when they are in locked mode
LOCK: Lock either the whole model or the selected assemblies so you don’t move it around by accident
SECTIONS: You can control your individual sections here by clicking on the arrow below ‘Selections’
SECTIONS OPTIONS:
The first option allows you to choose, which sections are shown or hidden
The second option lets you lock or unlock the sections
The third option lets you enable or disable the sections
AUTOCAD: Import a .dwg or a .dxf file here to drop it on the ‘floor’
LEVEL: If you have a developers license, this lets you choose the different modes. None is the normal default mode, Debug gives you extra information in the log and Detailed allows you to see the physical features of the real model around the graphic model
RESET: Resets the camera to default mode
FIT: See all your components on the screen at once
PROJECTION: Choose between perspective or orthogonal viewing projections.
STANDARD VIEWS: See the ‘model’ without perspective. This allows you to see the model from different angles and align your components perfectly. Move the camera to return to normal view or press the reset button
CAMERA 1-9: Review camera positions here. Save a camera position by pressing Ctrl + Shift + a number between 1-9 to save at the corresponding spot. Press the button with this view to return the camera position to the saved view
CLEAR: Lets you reset your saved camera positions
EXPORT + IMPORT: Lets you import or export your hidden camera positions
FOLLOW LOAD: Follow a selected load around your model
SHADOW: Set how much of a shadow the production line casts
LIGHTING: Choose where to place the light source on the model
MOTORS: Toggle visibility of motors on your model on/off
ACTION POINTS: Toggle the marker of the models action points on/off
4. Settings
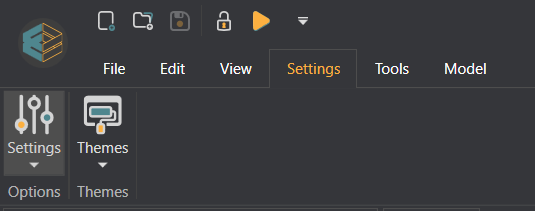
SETTINGS: Choose different settings for your model (see below)
THEMES: Choose which theme you want Experior to display
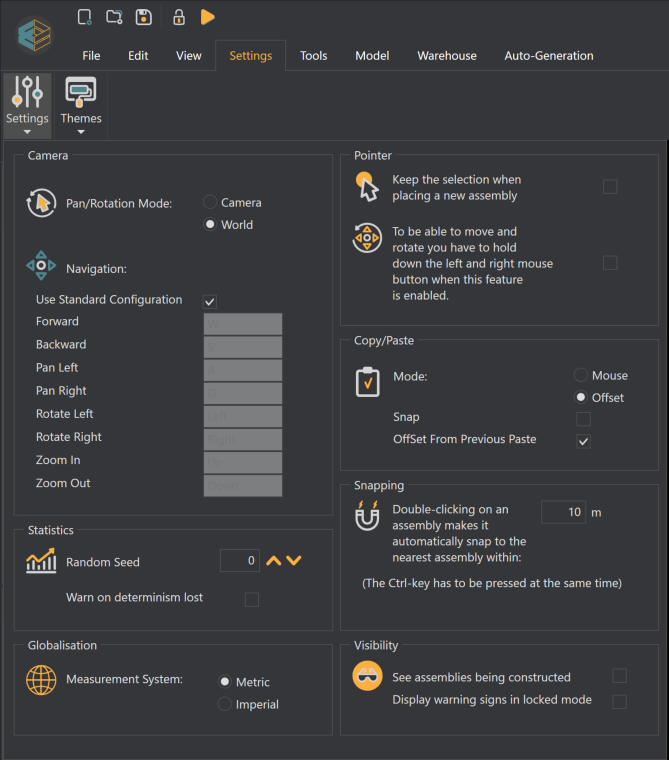
SETTINGS OPTIONS:
PAN/ROTATION MODE: Invert the camera controls. Lets you chose to see the scene from the point of view of the camera or of the scene – thereby changing which way you pan
NAVIGATION: Set hotkeys for camera movement
RANDOM SEED: Set the number you wish to use to initialize a random sequence
WARN ON DERTERMINISM LOST: toggle on/off if you want a warning if the random sequence differs from the previous random sequence
GLOBALIZATION: Choose measurement system
KEEP THE SELECTION: Toggle on/off if the new assembly continues to follow the arrow pointer when you move it around the model or it is placed at the position where you first click
MOVE AND ROTATE: Enable this to assure that the assembly does not move unless you hold down the left mouse button while turning it
MODE: Choose if anything you copy/paste is inserted where your mouse is or next to the object you copied it from
SNAP: Turn on/off if Experior should snap any component you copy/paste onto the nearest component
OFFSET FROM PREVIOUS PASTE: Toggles on/of if the assemblies are placed continuously after each other when you copy/paste several assemblies or if the assemblies you paste are all placed at the same position
SNAPPING: Set the radius in which the assembly snaps to the nearest assembly automatically when double clicking
SEE ASSEMBLIES: Shows how the model was build when you load it instead of loading it all at once
DISPLAY WARNING SIGNS: toggle on/off whether or not the warning signs are displayed when you lock the model
5. Tools
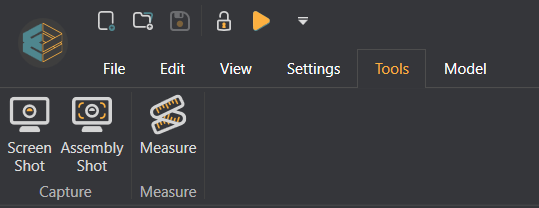
SCREEN SHOT: Take a screenshot of the whole model
ASSEMBLY SHOT: Take a screenshot of the selected assembly
MEASURE: Measure the distance between different components by clicking the measure icon and then pressing the model where you want the measuring tape to appear. Now you can move the two arrows of the measuring tape to set the distance you wish to measure
6. Model

PLAY: Starts the time
SCALE: Choose how fast you want the model to run. 1:1 sets time scale to real time
RESET: Return time and machines to zero and delete all loads
SINGLE STEP: (Developer only) Pause after every time step
RECORD: Records what happens in the scene. When you press it again you will have the option to replay what you recorded. If you want to reset the recording simply use the reset button on the left (It does NOT record a video but rather a series of events)
LOAD: Load any saved events recordings
SAVE: Save your events recording
SNAPSHOT: Exports information about the model as an Excel file
INFO: Shows information about the model you are running
FILTER: Adjust which parts of the model it is possible to select
MOVE: Select loads without being able to move them
EAT: Toggle on/off if you want loads to be deleted automatically when it hits the floor. It does not delete loads already on the floor when you toggle it on
AUTO/MAN: Choose if you want Experior to calculate routes on the assembly line if more than one option is available or if you want to do it manually
