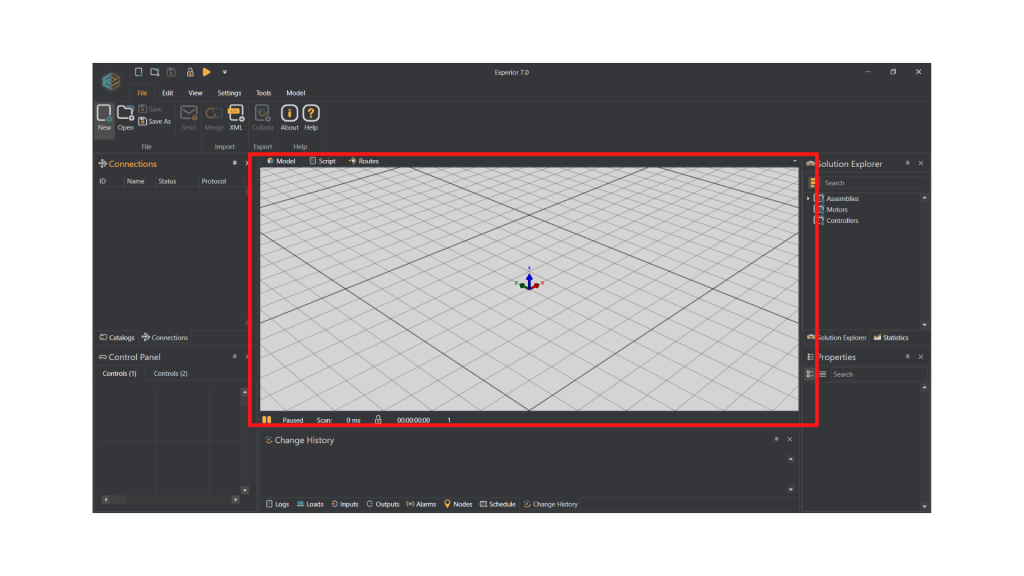
The model floor or ‘scene’ is where you can place your assemblies. This will display your model and it is also here that you can see what happens when the model is running.
The three arrows in the middle shows the axes of the model, where the green arrow is the Z-axis, the red arrow is the X-axis and the blue arrow is the Y-axis. The floor is gray by default but if you flip the model to see it from below the floor will show as see through.
To zoom in or out on the model, scroll the mouse wheel or set the zoom shortcuts in the settings menu.
If you wish to enlarge the floor you can go to the solutions explorer and open assemblies🠖section1. Now you can set the floor width and length in the properties window. Any alterations you make to the floor are only saved with this model so next time you open a new model the size will be back to the default.
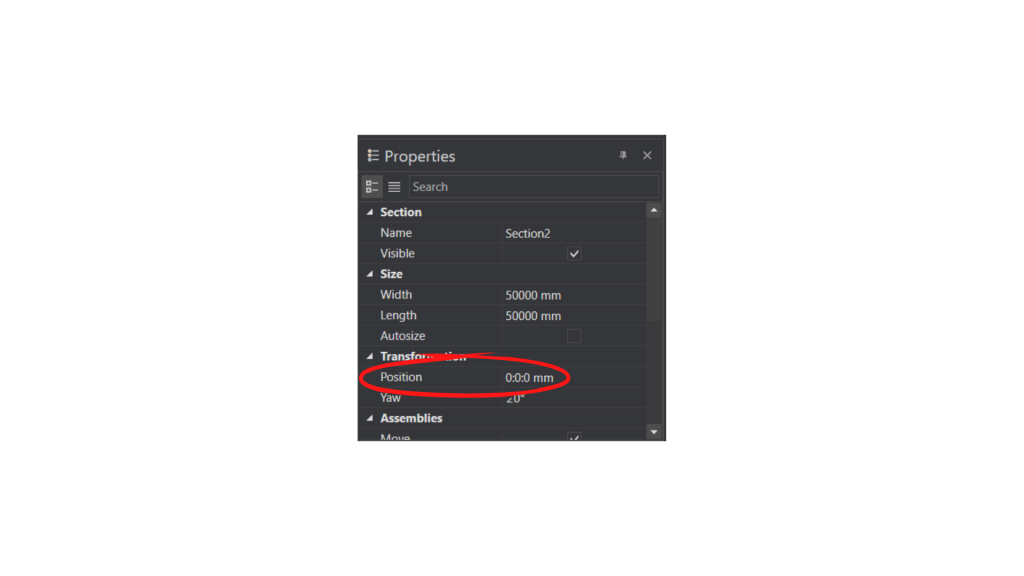
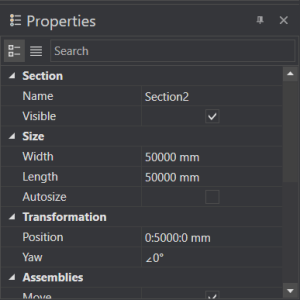
You can also add additional sections to your model. You do this by right clicking the assemblies tab in the Solution Explorer window. This opens up a menu where you can either add a section or show all sections. Press the ‘Add Section’ and a new section will show up on top of the first one. The second section will be named ‘Section 2’ in the assemblies tab. Unless you have changed the dimensions of the first section you will not be able to see the second section immediately as it is directly on top of the first. To change this click the second section to make it active. You will now see the information of this section in the properties window. One of the lines in this window is named ‘Position’ and looks like this:
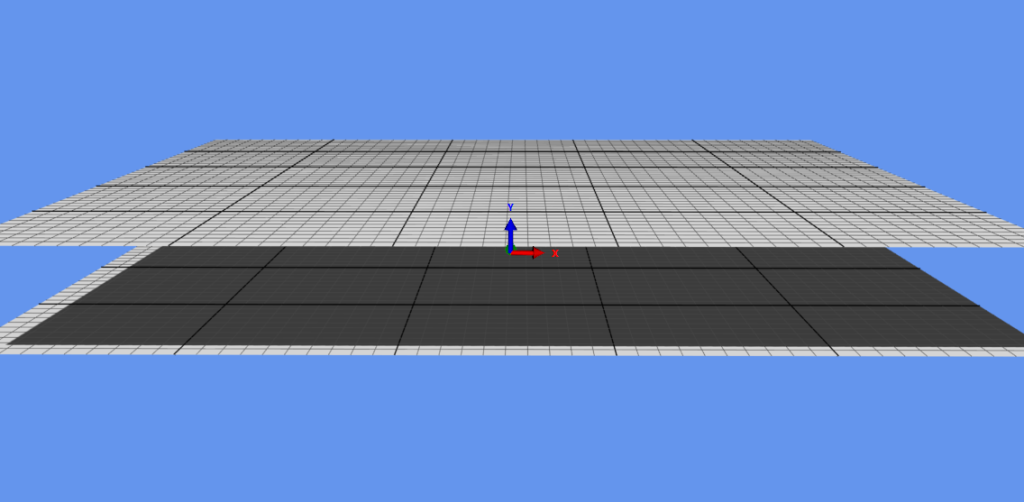
The first 0 represents the X-axis, the second 0 the Y-axis and the third 0 the Z-axis. by changing the numbers from 0 you can offset the second section from the first. If you for instance put 5000 in the Y-axis position the second section will raise itself 5000 mm above the first to look like this:
At the bottom of the floor window is a panel which shows information about the model:
PAUSED/RUNNING: Shows if the time is running or paused SCAN: Shows how long it took to calculate last physics step. If the number becomes too high, the machine begins having trouble calculating the steps and will send a warning in the diagnostics panel LOCK: Shows if the model is locked or not TIME: Shows how long the model has been running TIMESCALE: Shows how fast time is running in the model. 1 being real time and two being double real time etc. Maximum is 10 times real time for physics DIAGNOSTICS: Next to the number is the diagnostics panel which is empty when you first start Machine Expert Twin. Any alarms or errors will show up here
If you right click on the panel it will allow you to customize the panel.
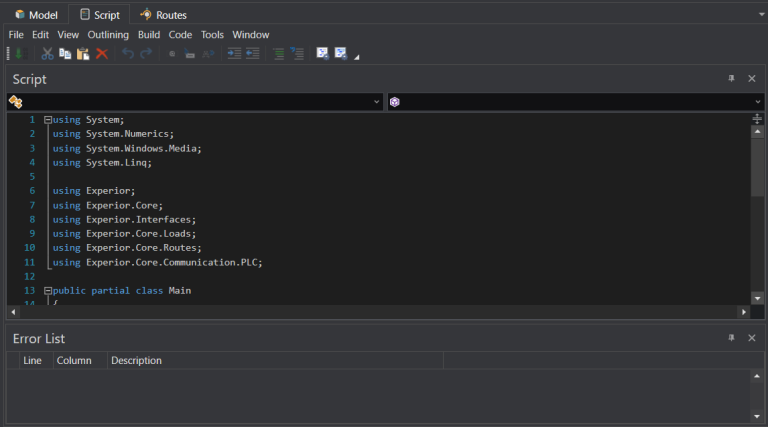
2. Script
The script tab allows you to write script inside Experior while the program is running. Pressing the icon with the green arrow above the script named ‘build’ will integrate your code in the program.
The error list below the script shows if any part of your inputs have resulted in an error.
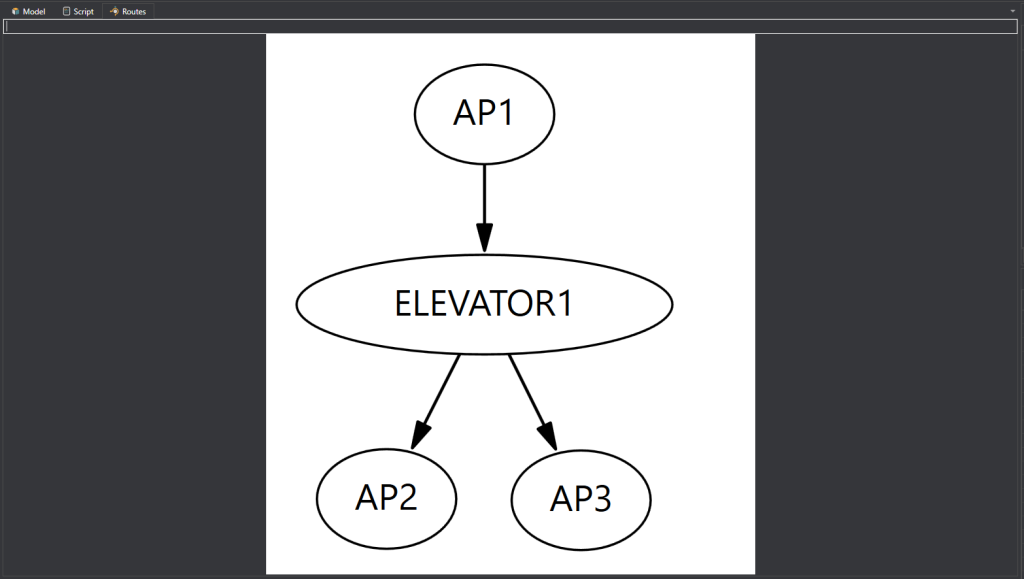
3. Routes - Only for Discrete Events Mode
The routes window is where you can see the connection between any assemblies and/or action points which are connected by a route network. It might look something like this:
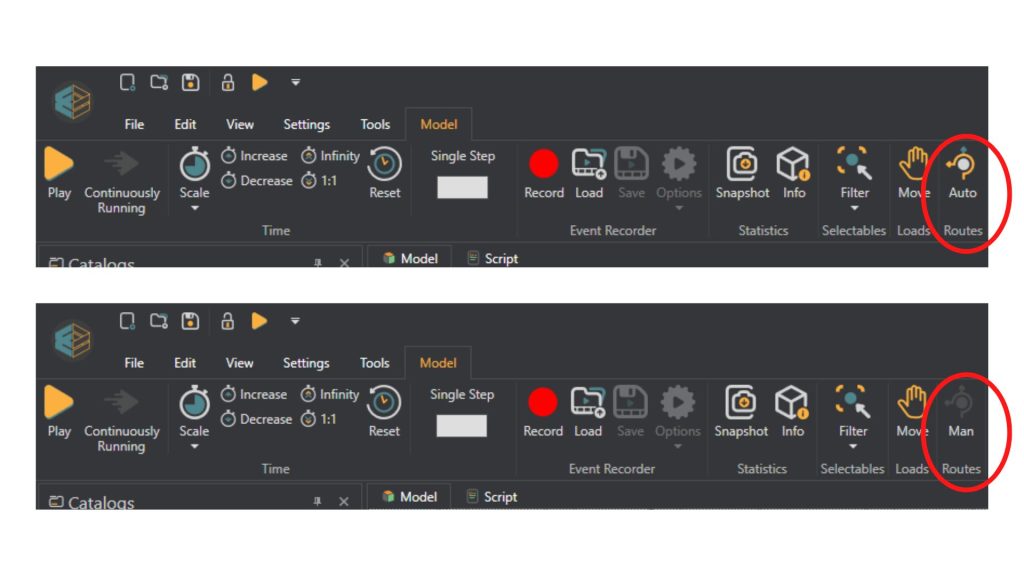
You can manipulate the routes by dragging the assemblies around in the routes window. The routes are automatically updated by default. If you wish to change this so the routes are updated less frequently you can go to the model tab in the menu at the top of Experior and find the routes icon at the very end of the panel:
By pressing this, you can switch between automatically updating the routes and manually updating. When you switch to manual the routes are not updated again until you switch it back to auto.
We use cookies on our website to give you the most relevant experience by remembering your preferences and repeat visits. By clicking “Accept All”, you consent to the use of ALL the cookies. However, you may visit "Cookie Settings" to provide a controlled consent. You can view our policy on privacy and use of cookies in the privacy policy tab found in the bottom of the site
This website uses cookies to improve your experience while you navigate through the website. Out of these, the cookies that are categorized as necessary are stored on your browser as they are essential for the working of basic functionalities of the website. We also use third-party cookies that help us analyze and understand how you use this website. These cookies will be stored in your browser only with your consent. You also have the option to opt-out of these cookies. But opting out of some of these cookies may affect your browsing experience.
Necessary cookies are absolutely essential for the website to function properly. These cookies ensure basic functionalities and security features of the website, anonymously.
Cookie
Duration
Description
cookielawinfo-checkbox-analytics
11 months
This cookie is set by GDPR Cookie Consent plugin. The cookie is used to store the user consent for the cookies in the category "Analytics".
cookielawinfo-checkbox-functional
11 months
The cookie is set by GDPR cookie consent to record the user consent for the cookies in the category "Functional".
cookielawinfo-checkbox-necessary
11 months
This cookie is set by GDPR Cookie Consent plugin. The cookies is used to store the user consent for the cookies in the category "Necessary".
cookielawinfo-checkbox-others
11 months
This cookie is set by GDPR Cookie Consent plugin. The cookie is used to store the user consent for the cookies in the category "Other.
cookielawinfo-checkbox-performance
11 months
This cookie is set by GDPR Cookie Consent plugin. The cookie is used to store the user consent for the cookies in the category "Performance".
viewed_cookie_policy
11 months
The cookie is set by the GDPR Cookie Consent plugin and is used to store whether or not user has consented to the use of cookies. It does not store any personal data.