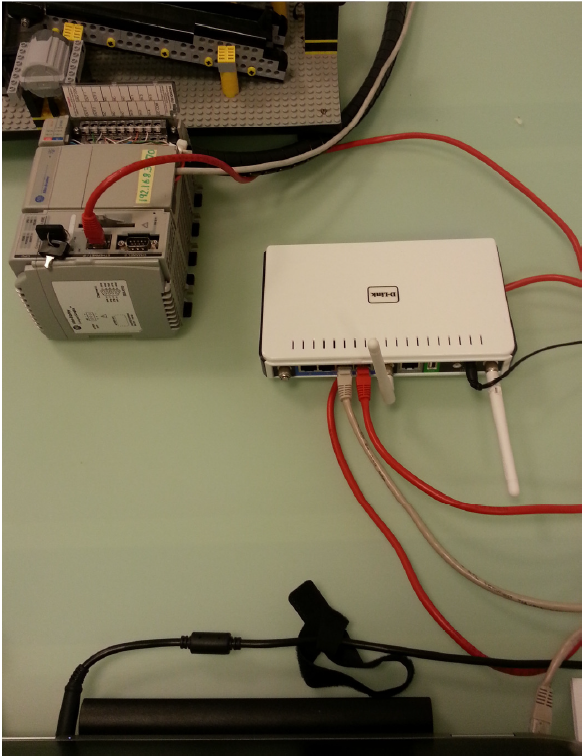
Hardware required: 2 network cables (straight) & 1 switch. See example below.
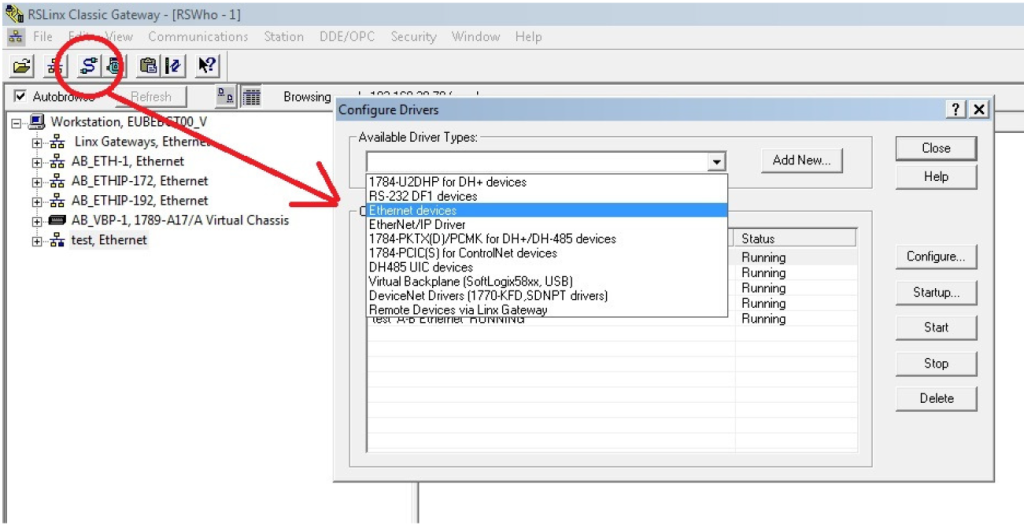
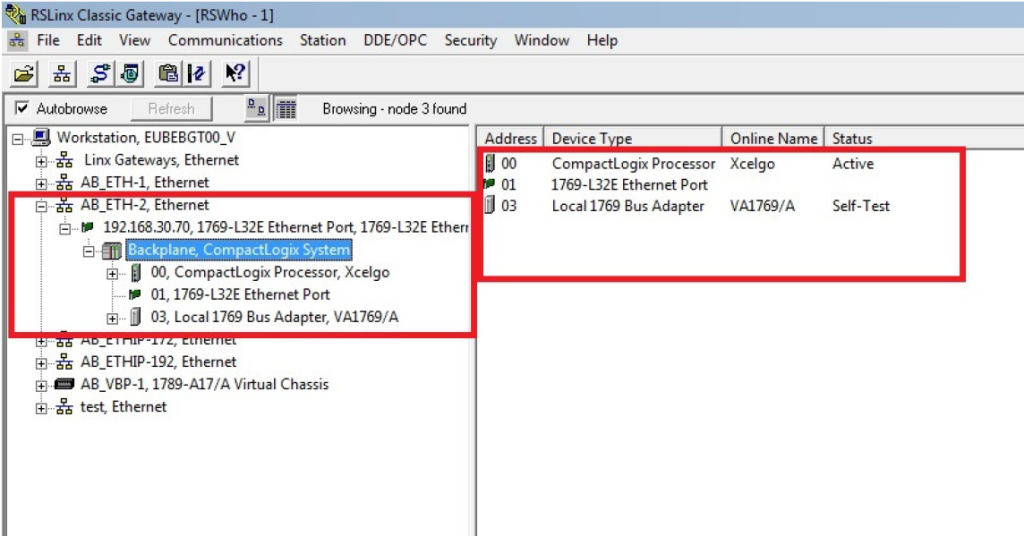
1. Start RSLinx: Find the Ethernet devices Driver.
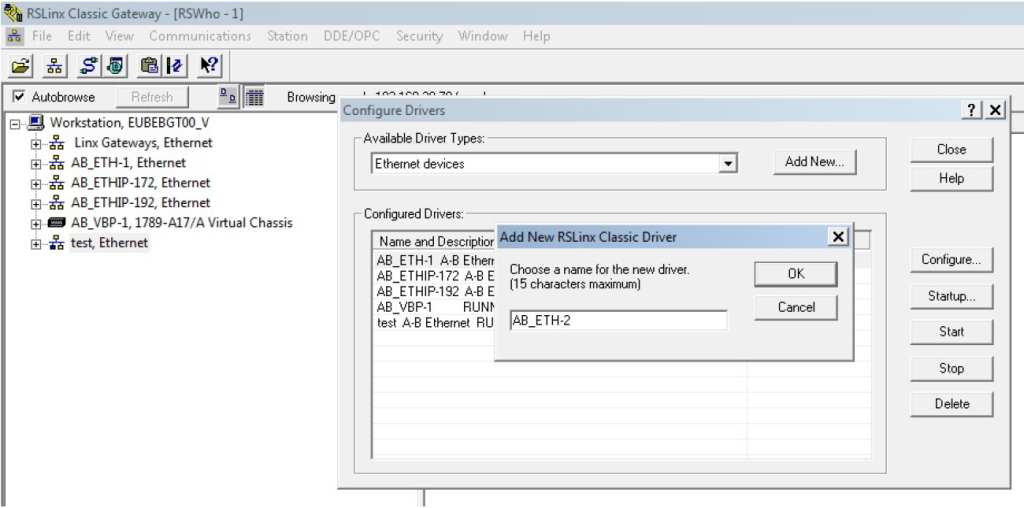
2. Give the driver a Name.
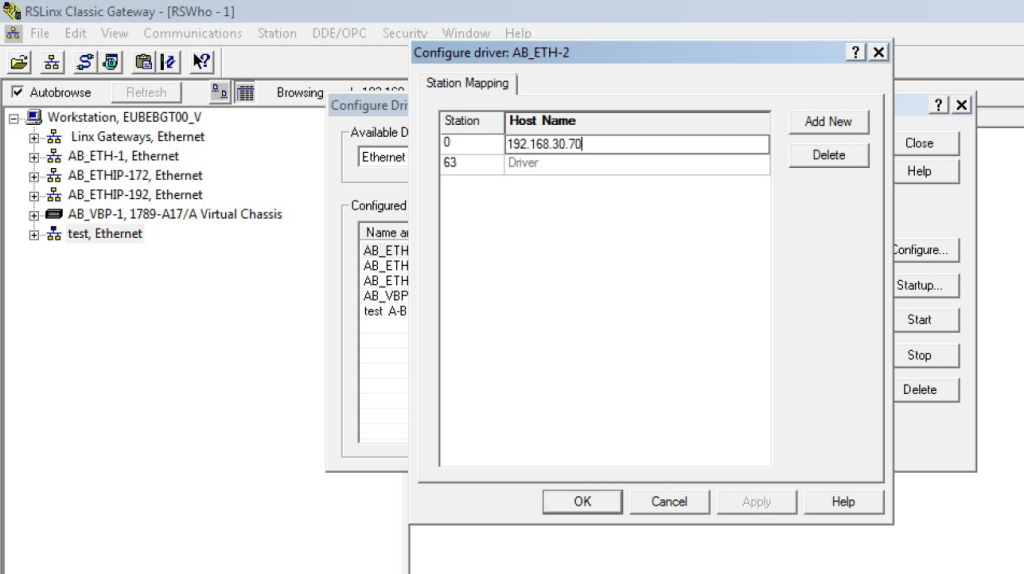
3. Type the right IP address into the Host Name.
4. After all is done the setup should show the Network card and the backplane with the processor and the Ethernet card & the I/O card.
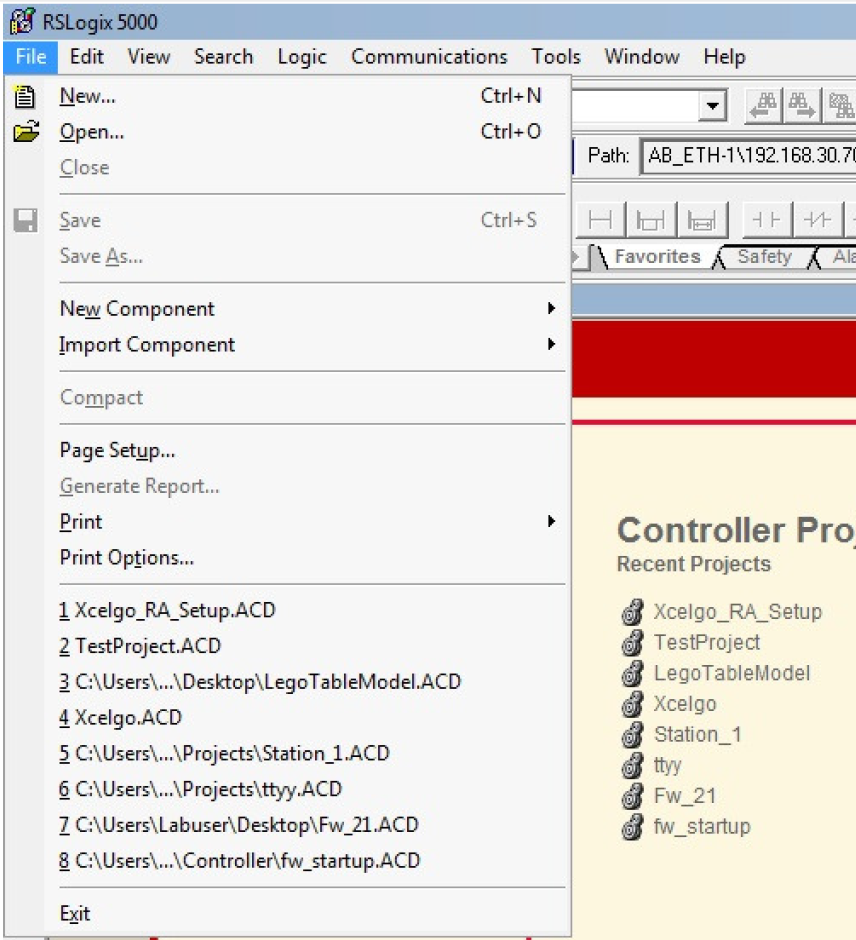
5. Start the RSLogix 5000 software.
6. Choose File – > New.
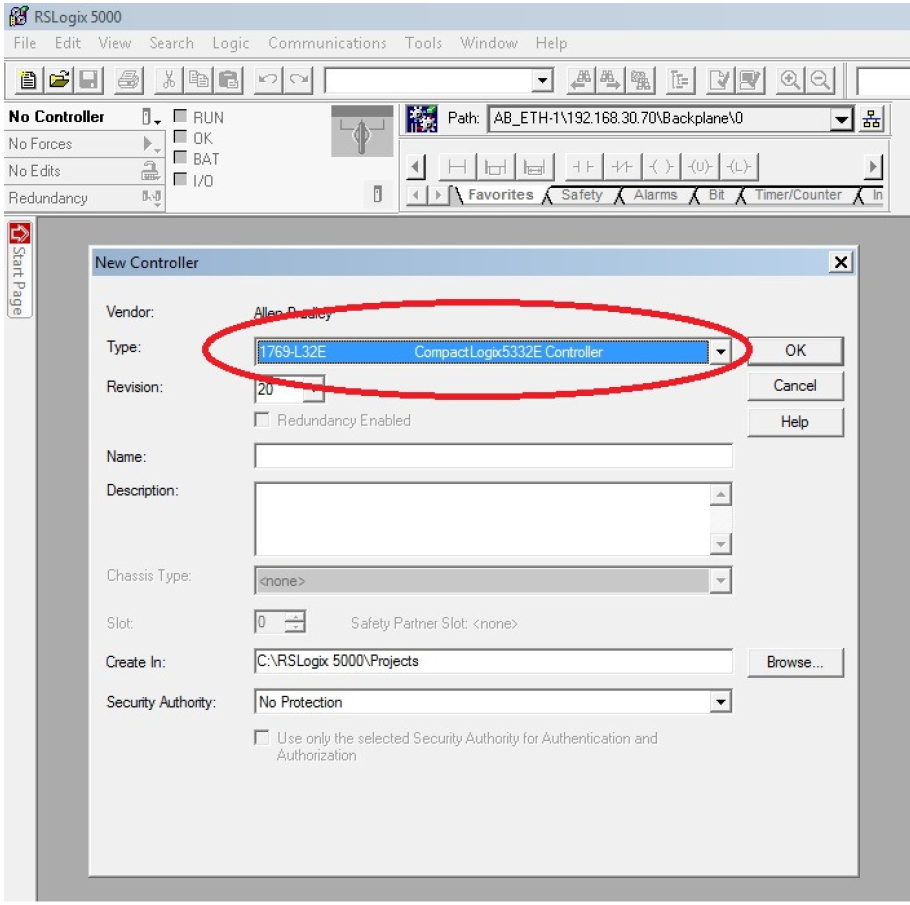
7. Find the right Controller in the drop down list. Give it a Project name.
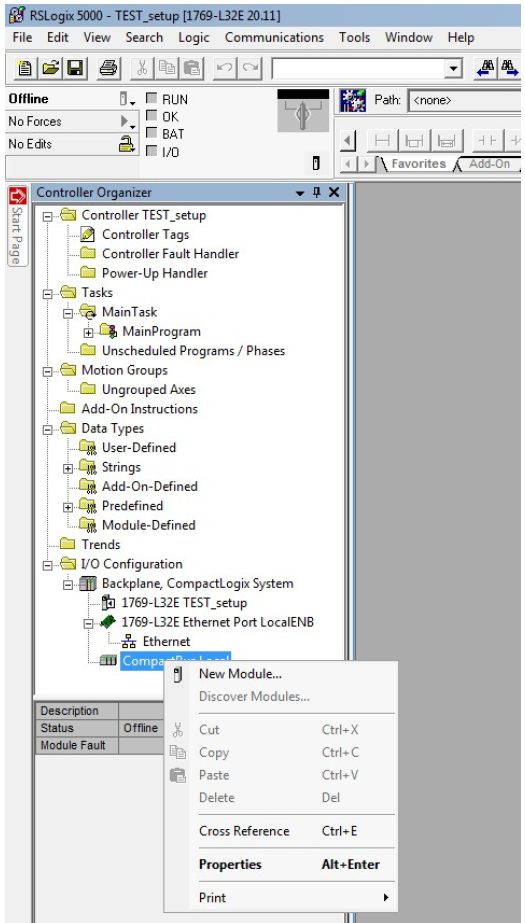
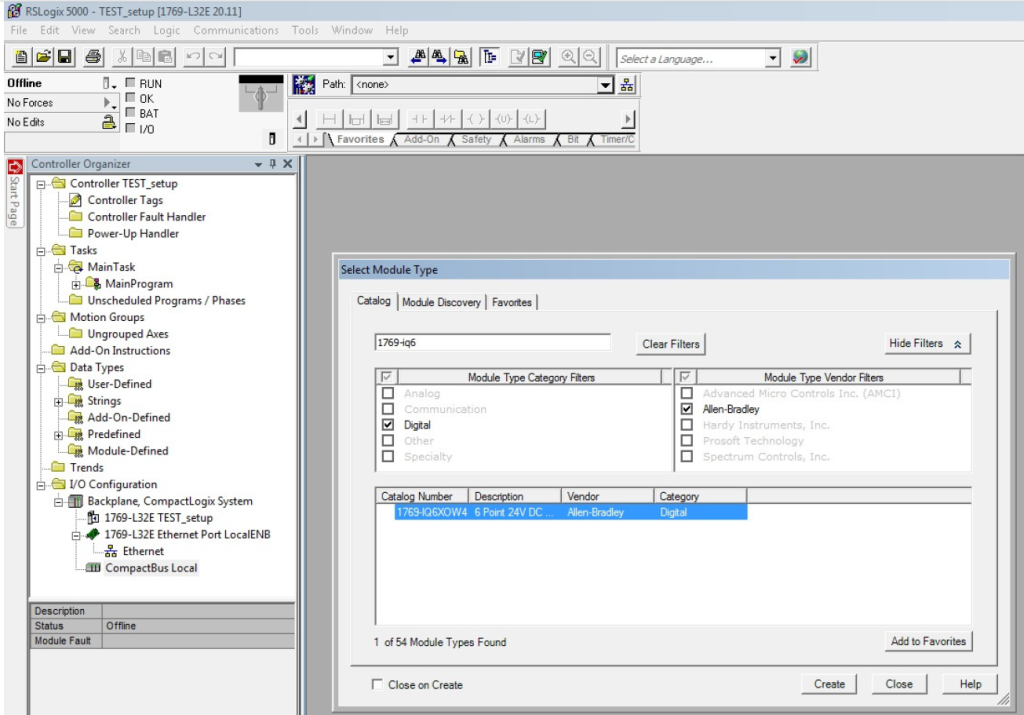
8. Add the Input/Output units to the chassis.
9. For the Lego application it’s a 1769-IQ6XOW4.
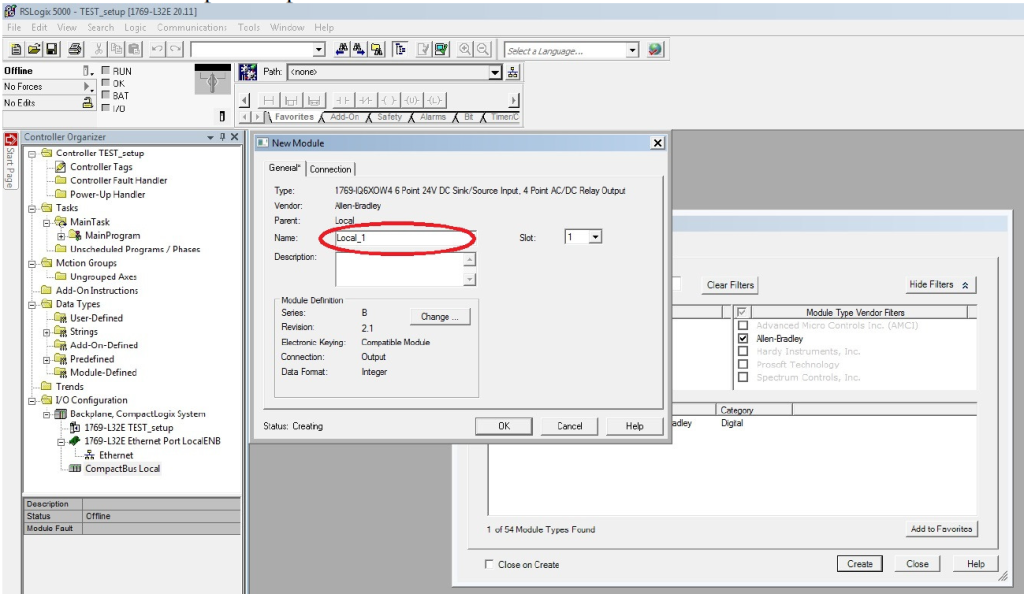
10. Give the Input/Output a name, for example Local_1.
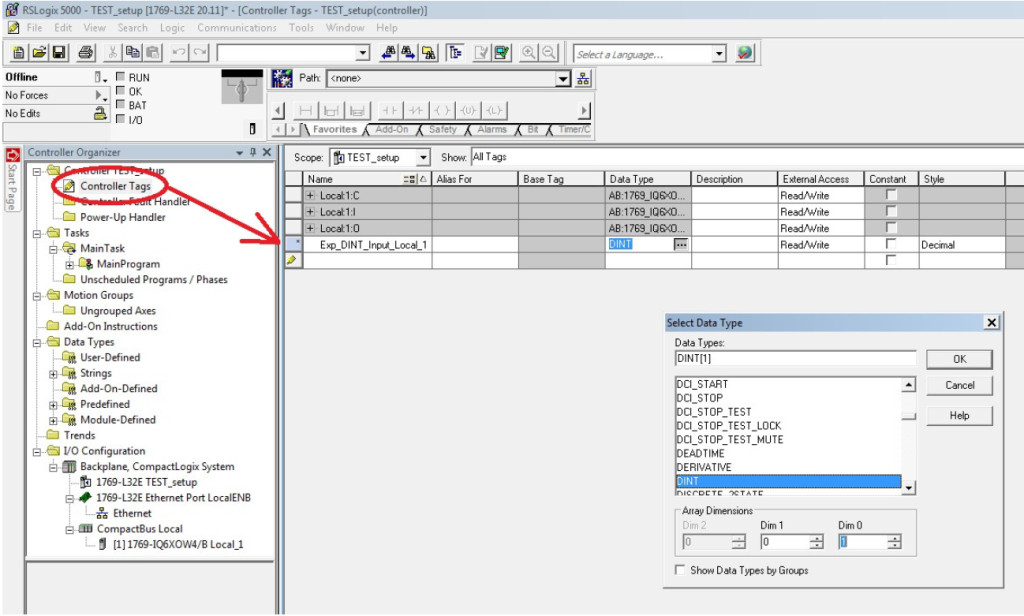
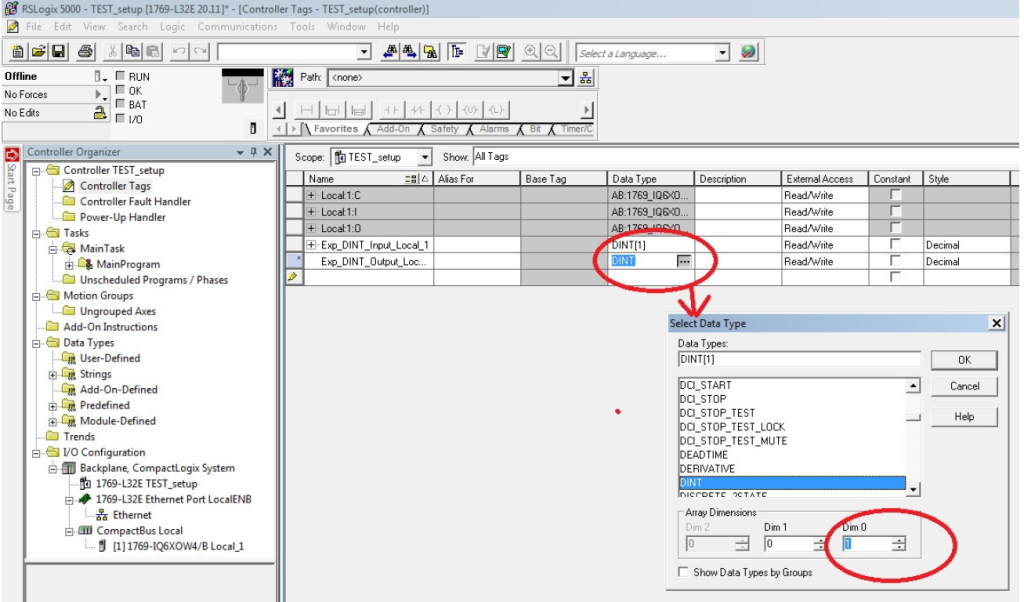
11. Open Controller Tags and put in the name that is predefined in the virtual software. In this case Exp_DINT_Input_Local_1. Remember to make the Data Type an array of 1.
12. It’s important to make it a Data TypeDINT and a array of 1. It is for the addressing from the virtual addressing.
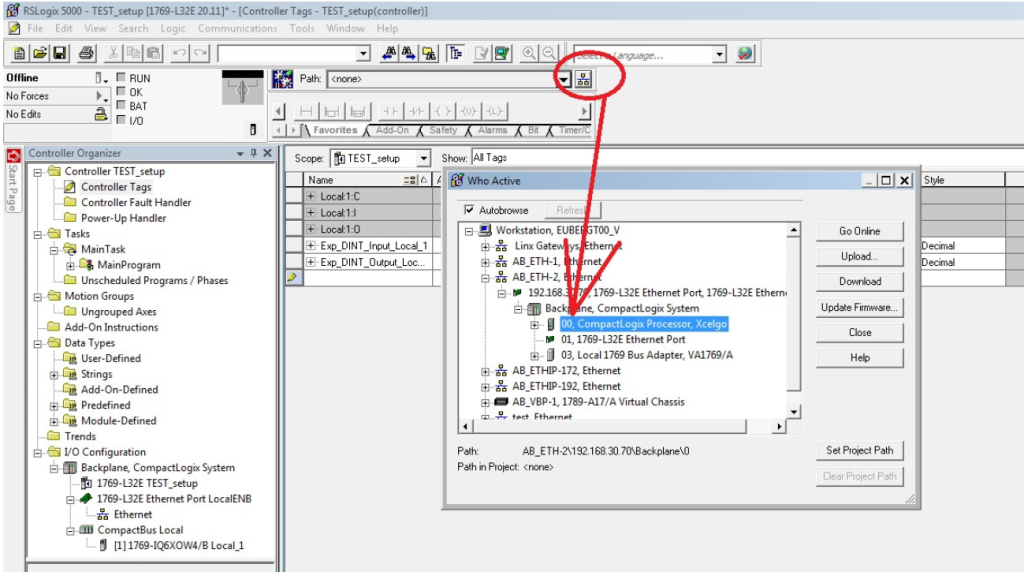
13. Browse the Controller using the button Who Active.
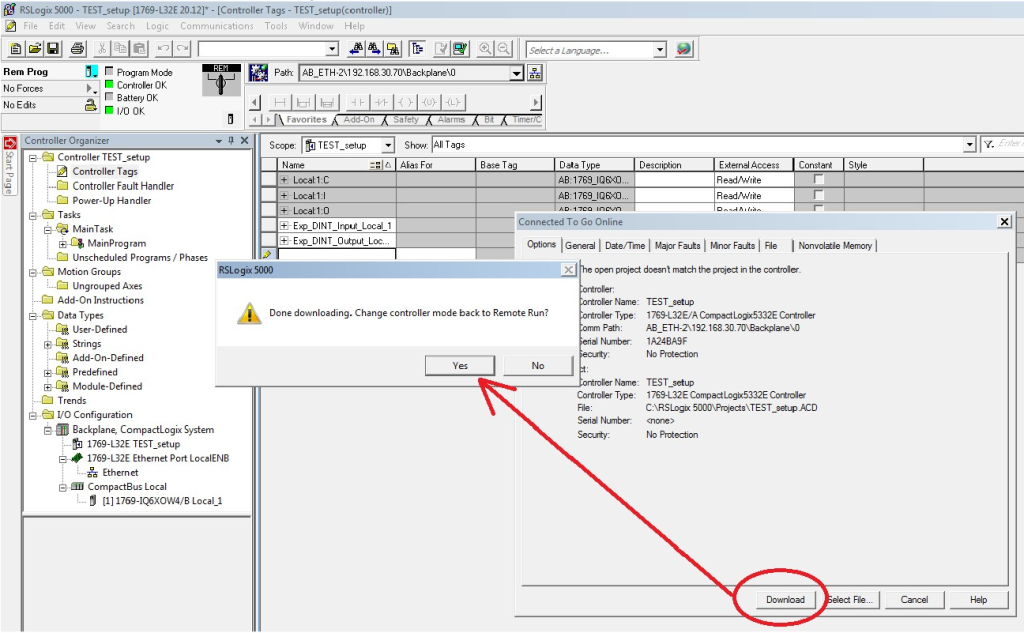
14. Press Download. After download select YES in the pop up bar, this will set the PLC into run mode.
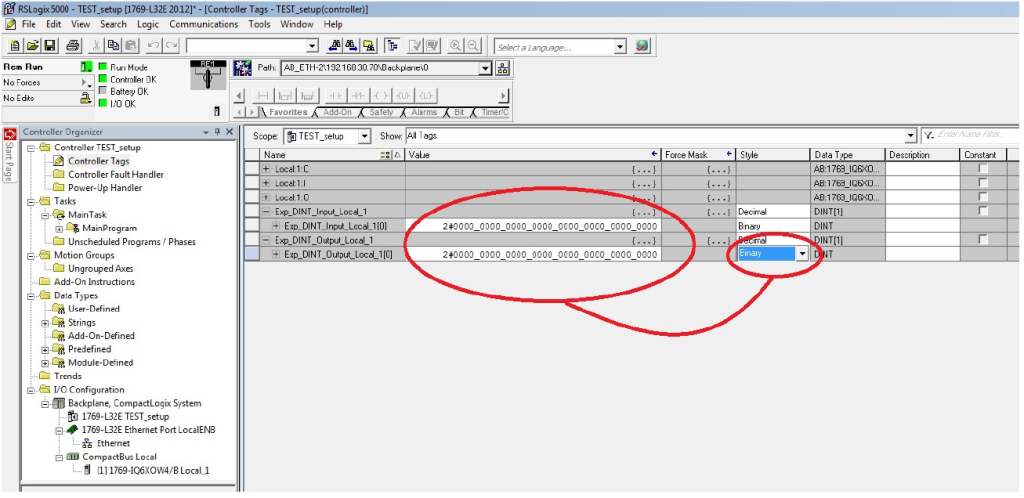
15. When Online select the Controller tags and monitor the status for the arrays. For a better overview change the settings to binary.
We use cookies on our website to give you the most relevant experience by remembering your preferences and repeat visits. By clicking “Accept All”, you consent to the use of ALL the cookies. However, you may visit "Cookie Settings" to provide a controlled consent. You can view our policy on privacy and use of cookies in the privacy policy tab found in the bottom of the site
This website uses cookies to improve your experience while you navigate through the website. Out of these, the cookies that are categorized as necessary are stored on your browser as they are essential for the working of basic functionalities of the website. We also use third-party cookies that help us analyze and understand how you use this website. These cookies will be stored in your browser only with your consent. You also have the option to opt-out of these cookies. But opting out of some of these cookies may affect your browsing experience.
Necessary cookies are absolutely essential for the website to function properly. These cookies ensure basic functionalities and security features of the website, anonymously.
Cookie
Duration
Description
cookielawinfo-checkbox-analytics
11 months
This cookie is set by GDPR Cookie Consent plugin. The cookie is used to store the user consent for the cookies in the category "Analytics".
cookielawinfo-checkbox-functional
11 months
The cookie is set by GDPR cookie consent to record the user consent for the cookies in the category "Functional".
cookielawinfo-checkbox-necessary
11 months
This cookie is set by GDPR Cookie Consent plugin. The cookies is used to store the user consent for the cookies in the category "Necessary".
cookielawinfo-checkbox-others
11 months
This cookie is set by GDPR Cookie Consent plugin. The cookie is used to store the user consent for the cookies in the category "Other.
cookielawinfo-checkbox-performance
11 months
This cookie is set by GDPR Cookie Consent plugin. The cookie is used to store the user consent for the cookies in the category "Performance".
viewed_cookie_policy
11 months
The cookie is set by the GDPR Cookie Consent plugin and is used to store whether or not user has consented to the use of cookies. It does not store any personal data.