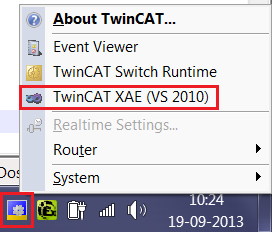
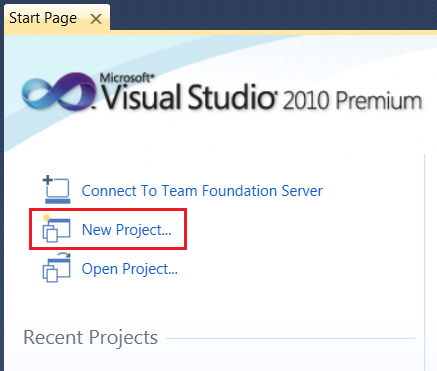
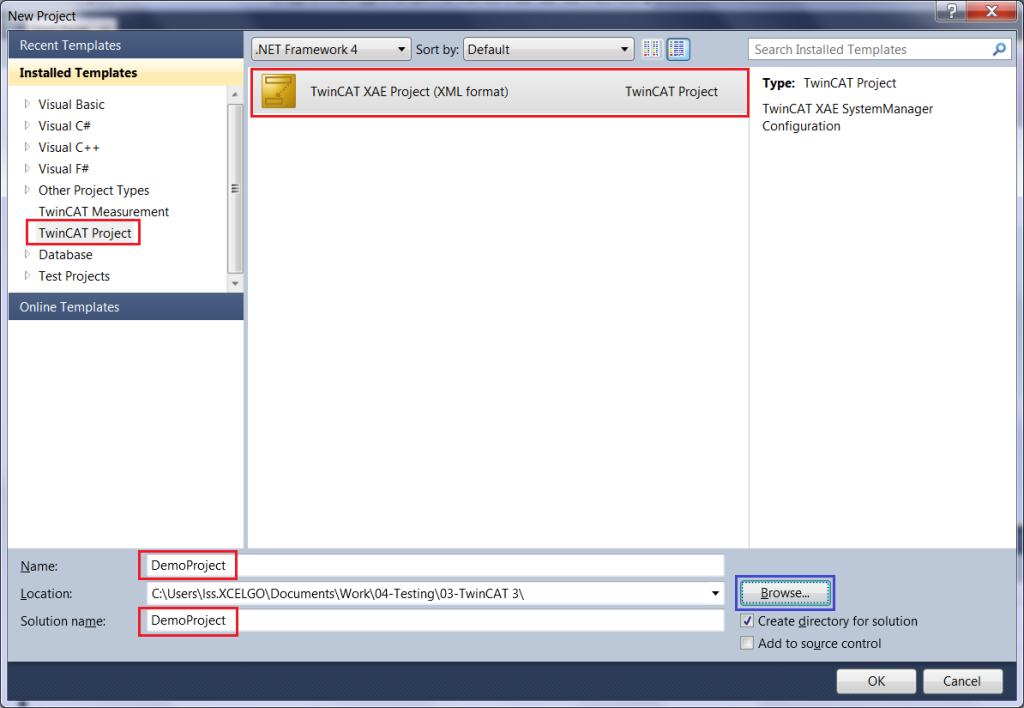
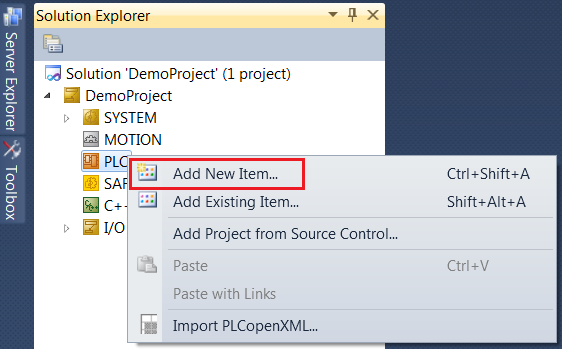
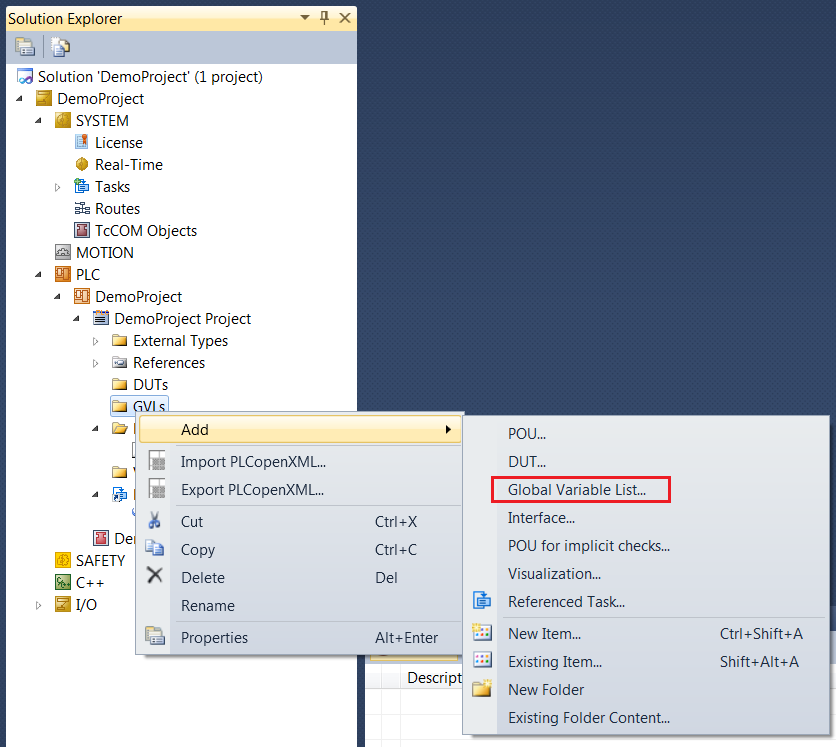
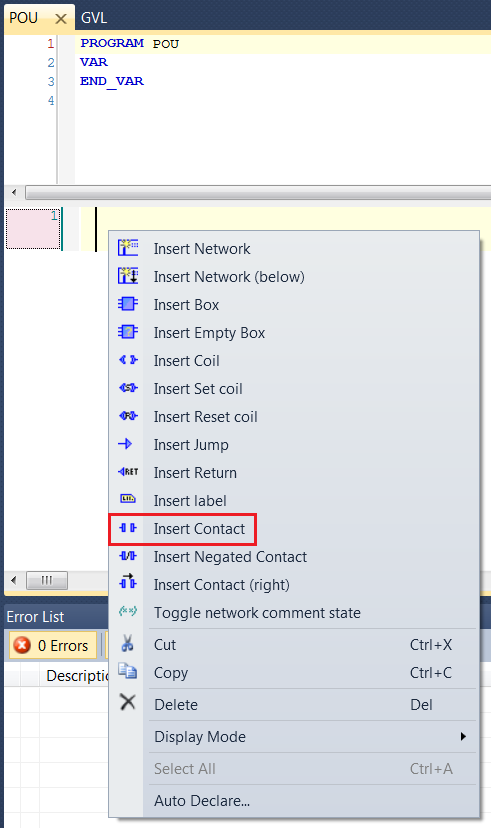
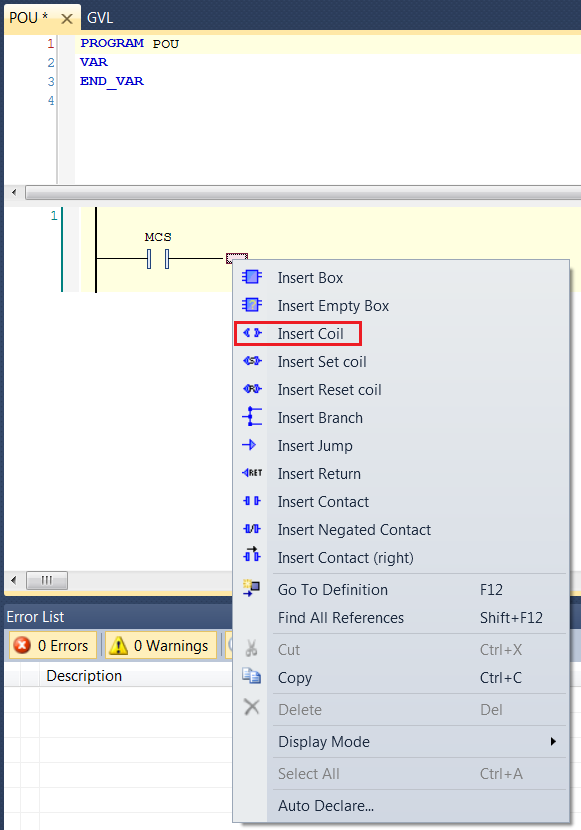
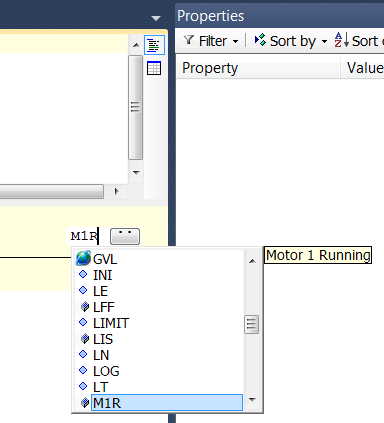
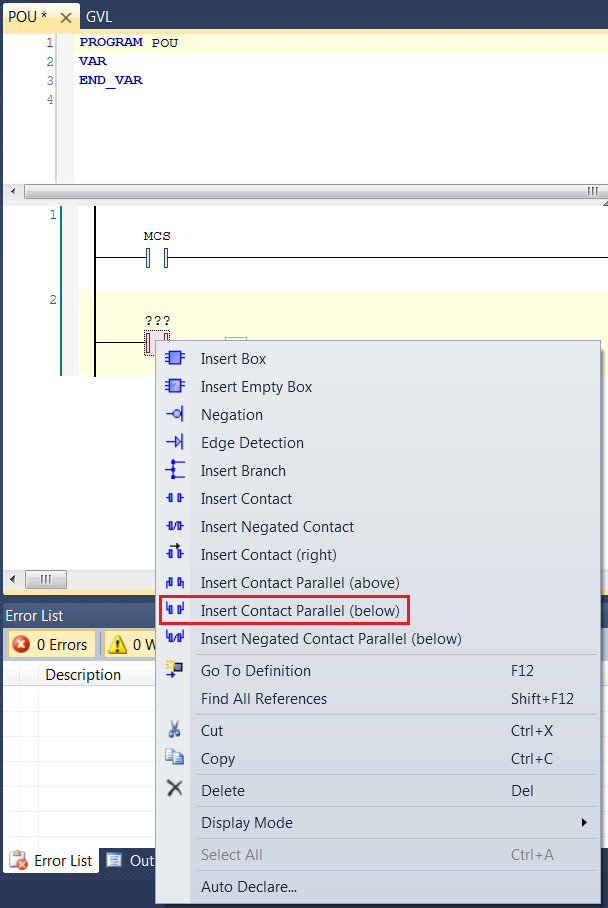
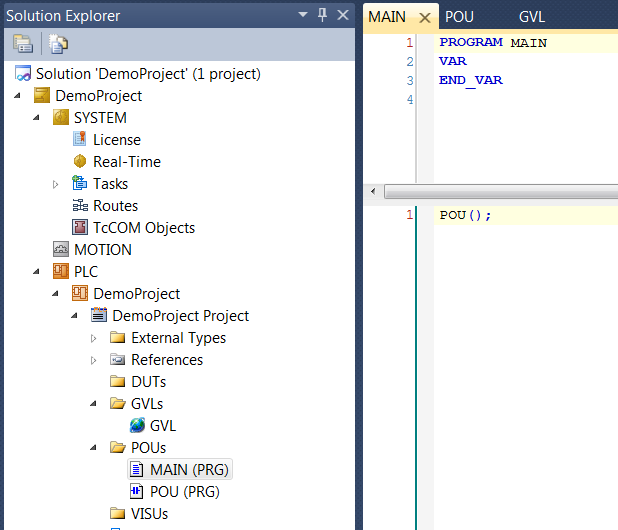
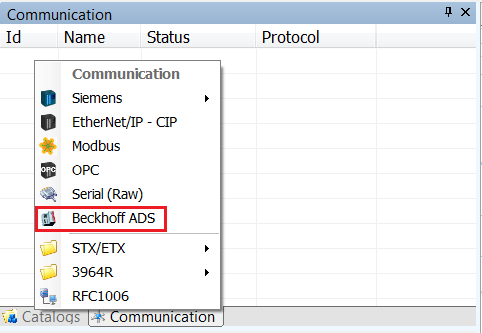
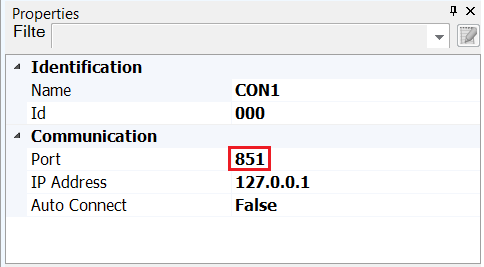
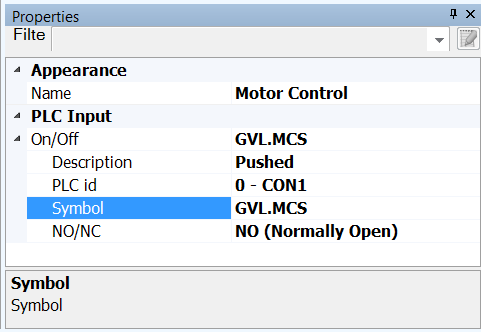
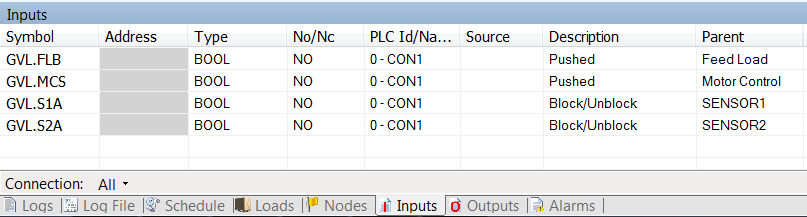
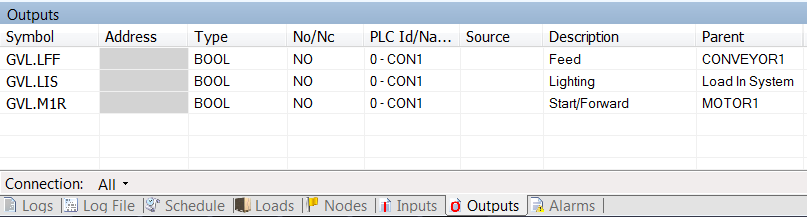
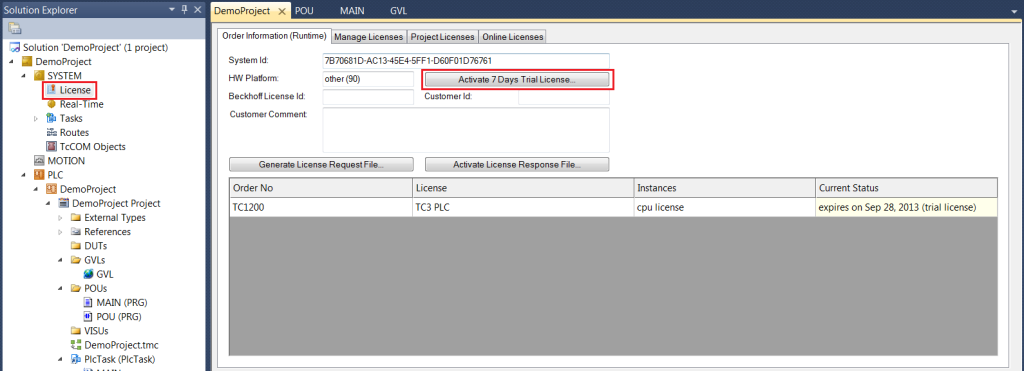
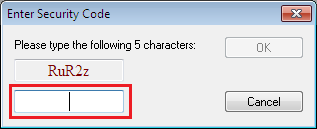
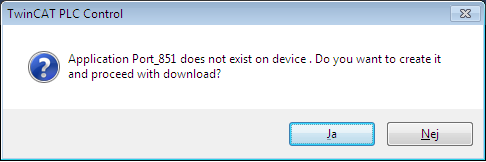
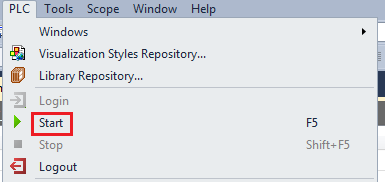
< All TopicsTwinCAT 3 SoftPLC PostedNovember 5, 2021 UpdatedNovember 5, 2021 ByKasper Vestrup This section covers how to use the TwinCAT 3 software as a SoftPLC to program and run the basic psychics model example.Right click on the TwinCAT3 icon in the taskbarClick on TwinCAT XAE(VS2010) On the Start Page click New TwinCAT Project (or New Project if Visual Studio 2010 is also installed on machine) Fill in the fields, project name for example would be DemoProject Use BROWSE to select where to save the programWhen done click OKIn Solution Explorer on the left hand side right click PLC Select Add New ItemThe Add New Item window opensSelect Standard PLC ProjectFill in the name field, for example DemoProject Click ADDThe next step is to create a Global Variable ListRight click on GVLs and select Add and from the pop out menu select Global Variable List Name the file and click OPEN The Global Variable List is now createdNow cut and paste the following between VAR_GLOBAL and END_VAR MCS: BOOL; //Motor Control Switch LIS: BOOL; //Load In System Lamp FLB: BOOL; //Feed Load Button LFF: BOOL; //Load Fed from Feeder M1R: BOOL; //Motor 1 Running S1A: BOOL; //Sensor 1 Activated S2A: BOOL; //Sensor 2 Activated The next step is to create the program blockRight click on POUs and select Add and from the pop out menu select POU… Enter a new name, leave the Type as Program and the Implementation Language as Ladder Logic Diagram (LD) Now the ladder logic code for the model can be writtenIn the newly created ladder logic POU right click in the bottom half of the window and select Insert Contact Click on the 3 question marks above the contact and type in MCS, the variable should appear in a dropdownPress Enter to add it to the contact Now right click on the small box to the right of the contact and select Insert Coil Click on the 3 question marks above the coil and type in M1ROnce again the variable should appear in a dropdownPress Enter to add it to the coil To add the next line of logic right click to the left where the number 1 is shownFrom the menu select Insert Network (below) In the new line two contacts need to be added in parallelTo do this add the first contact as done previously and then right click on that contact and select Insert Contact Parallel (below) Then, to the right of the contacts, right click and select Insert CoilThe top contact should be assigned variable FLB and the bottom contact variable S2AThe coil should be assigned variable LFFNow add one more Network below to which should be added a contact and a coilThe contact should be assigned the variable S1A and the coil variable LISThe last thing to do here for the moment is to add a reference to the ladder logic module into the Main programIn the Solution Explorer on the right under PLC->Project Name->PLC Name->POUs double click Main to open itIn the first line of the lower section of the file type POU(); where POU is the name of the file with the ladder logic in it Save the program (Save All button or key combination CTRL+SHIFT+S)Now back in Experior click on the Communications tab on the right of the Experior window, just below where the Catalogs are displayedRight click and select Beckhoff ADS Select the newly created entry and in the Properties pane, to the bottom right of the Experior window, change the Port to 851 Now the variables have to be added to their respective componentsSelect the Motor Control switch and in the properties under PLC Input -> On/Off expand the section using the small arrow to the left of On/OffInput the symbol as GVL.MCS, the reason for the GVL prefix is so Experior knows the variable is global and not local For the lamp Load In System the symbol should be input under PLC Output -> LightingFor the button Feed Load the symbol should be added under PLC Input” -> PushedFor the feeder the symbol should be added under PLC Output -> FeedFor the sensors the symbols should be added under PLC Input -> BlockedLastly, the symbol for the motor should be added under Operation -> Forward (Output)When finished the Input and Output tabs should contain information like so Save the model at this pointBack in the TwinCAT program it should now be built and have a license generated so that it is ready to runTo build the program, go to the Build menu at the top and select Build SolutionNow a license needs to be generated to enable the program to be runGo to the Solution Explorer on the leftExpand System and double click on LicenseClick on Activate 7 days trial license? Enter the characters displayed in the input box Click OKUnder the TwinCAT menu select Activate Configuration If prompted about overwriting an older configuration click Proceed When prompted to Restart TwinCAT System in Run Mode? click OKUnder the PLC menu click Login When prompted about application port_851 not existing, creating it and downloading the program, click YES Under the PLC menu click START Program is now running