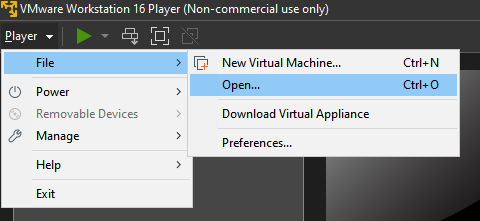
3. Open VMware Workstation. Open the URSim virtual machine (Player-File-Open, then browse the file explorer to where you unpacked the files from 2.a., then select the .vmx file).
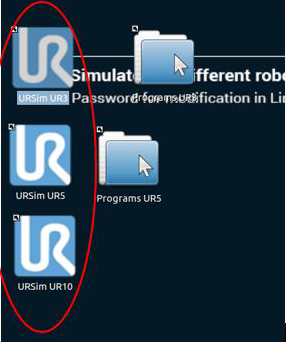
4. When the virtual machine is running, open the file with the name of the robot that you want to simulate. Then, turn the virtual robot on using the button on the bottom left.
Then click ON and START.
5. Open Experior 6.0. Make sure the UniversalRobots catalog is selected in the catalog selector. Drag and drop the desired robot from the Catalogs panel to the model.
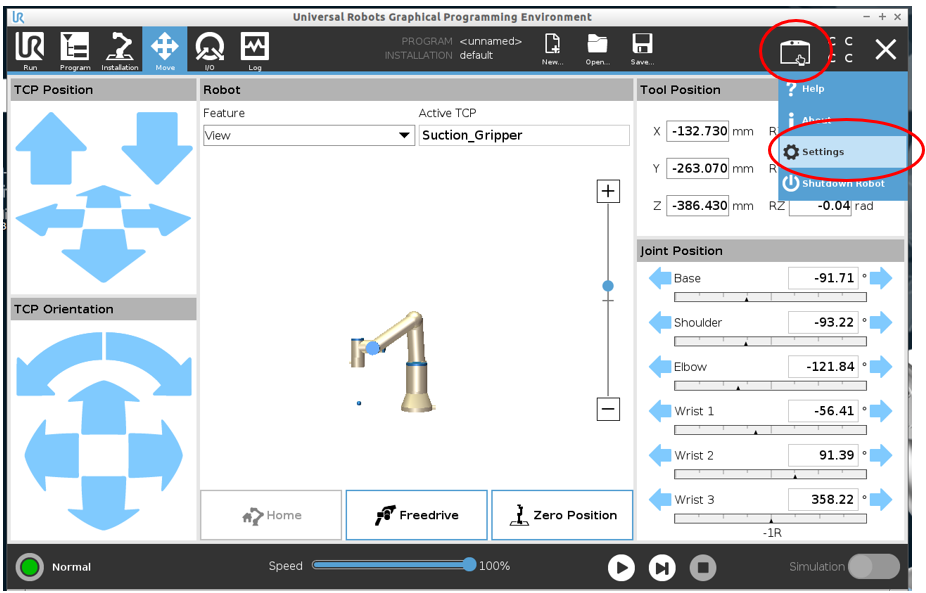
6. Go to URSim and open the robot settings.
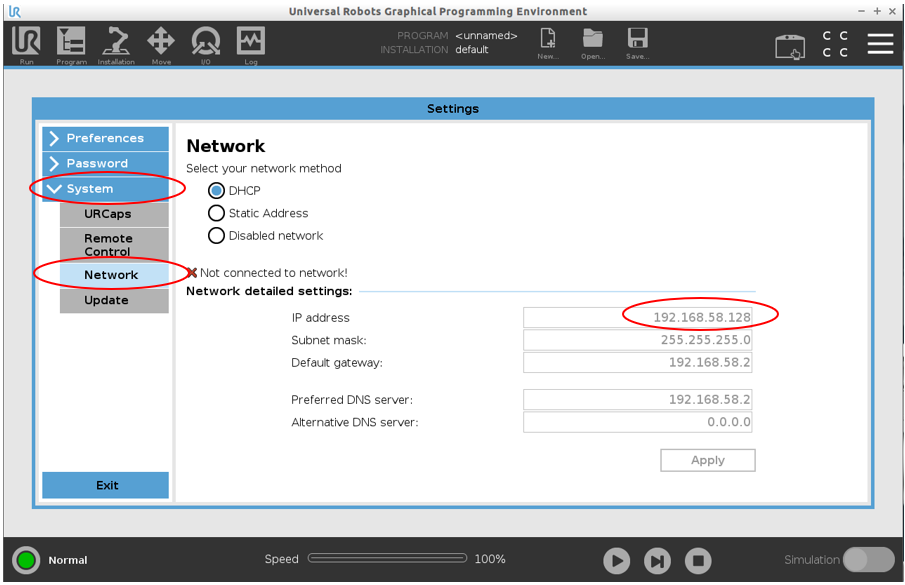
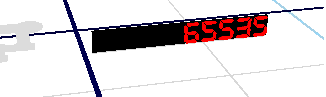
In the settings menu, select System-Network. Note the URSim IP address.
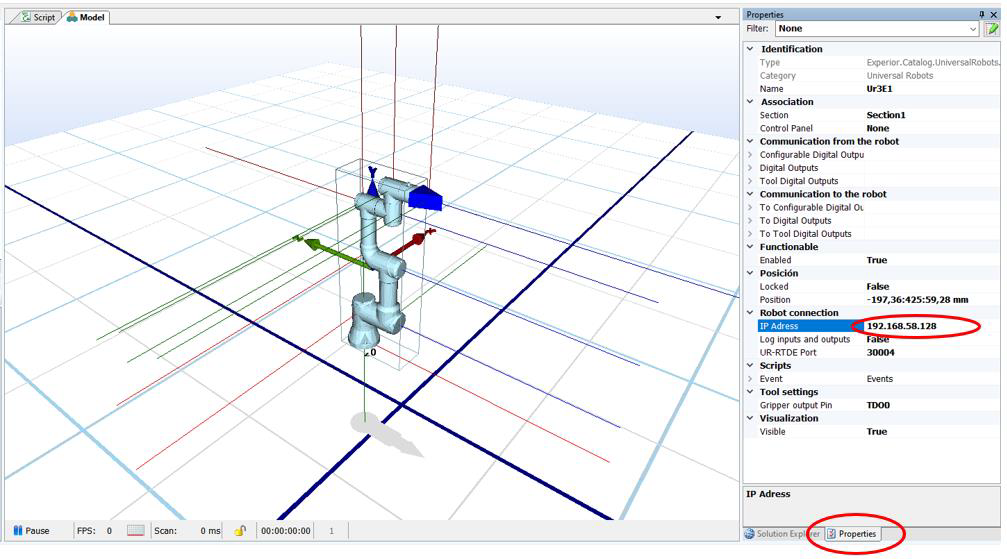
7. Connect URSim to Experior. Do this by going to your Experior model, selecting the robot, and writing the URSim IP address in the IP Address field, under Robot connection.
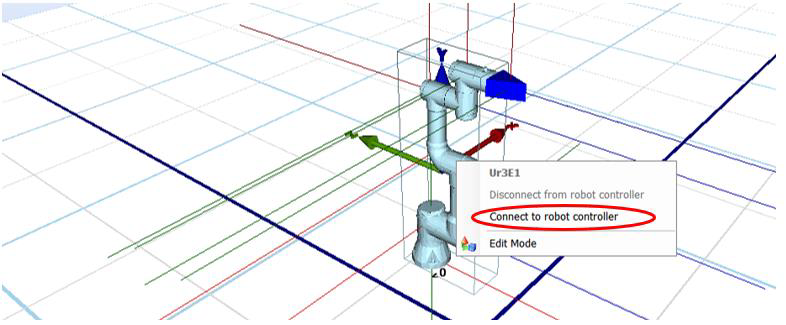
7.1 Afterward, right-click on the robot and select Connect to robot controller. After this, the robot in Experior will snap into the position of the robot in URSim.
After this, the robot in Experior will replicate the trajectory of the robot in URSim.
Connecting robot I/O through Modbus TCP
The following steps show how to connect the robot I/O through the URSim Modbus server and the Experior Modbus client.
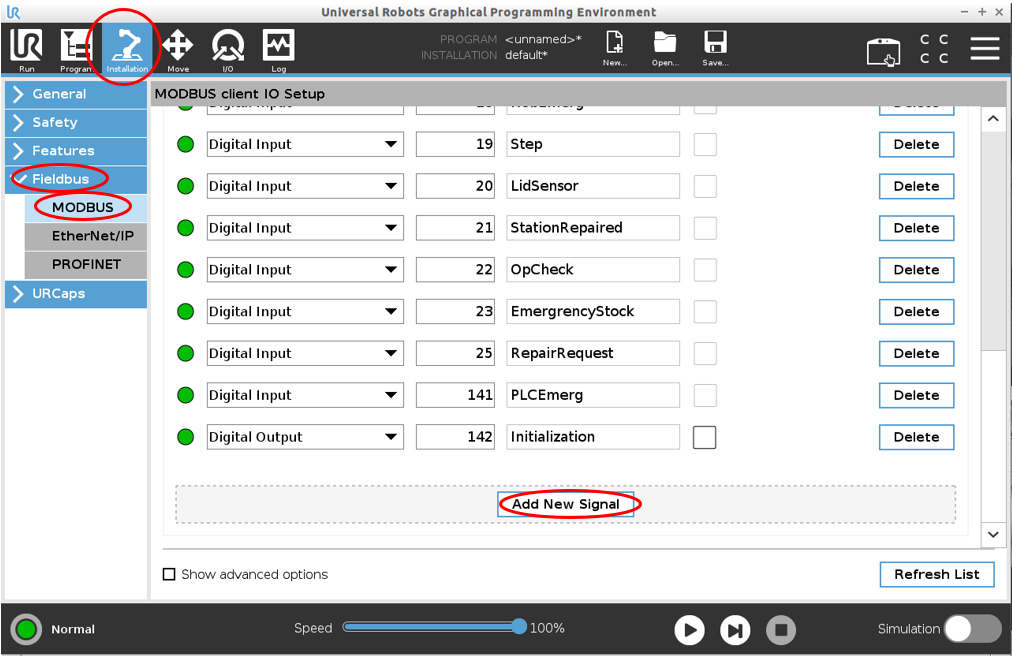
1. In URSim, go to Installation- Fieldbus- Modbus- Add a new signal. (Initially, the variable list will be empty) In the dropdown menu, select the variable type: Digital Input/Output, Register (byte) Input/Output. Rename the variable (this is the name that will be used in the UR programming interface)
2. Assign the memory address for the variable. For this, you need to take into account that all the addresses have specific uses (see here).
3. In Experior, add the Modbus client by right-clicking the Communication panel, and selecting Modbus.
4. Select the Modbus client, and in the Properties panel, write the URSim IP address in the IP Address field, under Communication.
5. Assign Input/Output variables to the desired components. To do this, first set the Connection id to the id corresponding to the Modbus client. Then, assign the memory address of the Modbus server (assigned in step 2) in the Address field for the specific Input/Output. Modify the Register value, depending on the variable type defined in step 2. For Register Inputs/Outputs, Modify the Size value to UInt16 (WORD).
6. After all the memory addresses have been set in Experior, right-click on the Modbus client and click connect. While the connection is active, you won´t be able to modify the associated I/O in Experior.
After this, the variable values will be represented in the Experior model.
(This example was made with the Display assembly, found in the Advanced catalog)
We use cookies on our website to give you the most relevant experience by remembering your preferences and repeat visits. By clicking “Accept All”, you consent to the use of ALL the cookies. However, you may visit "Cookie Settings" to provide a controlled consent. You can view our policy on privacy and use of cookies in the privacy policy tab found in the bottom of the site
This website uses cookies to improve your experience while you navigate through the website. Out of these, the cookies that are categorized as necessary are stored on your browser as they are essential for the working of basic functionalities of the website. We also use third-party cookies that help us analyze and understand how you use this website. These cookies will be stored in your browser only with your consent. You also have the option to opt-out of these cookies. But opting out of some of these cookies may affect your browsing experience.
Necessary cookies are absolutely essential for the website to function properly. These cookies ensure basic functionalities and security features of the website, anonymously.
Cookie
Duration
Description
cookielawinfo-checkbox-analytics
11 months
This cookie is set by GDPR Cookie Consent plugin. The cookie is used to store the user consent for the cookies in the category "Analytics".
cookielawinfo-checkbox-functional
11 months
The cookie is set by GDPR cookie consent to record the user consent for the cookies in the category "Functional".
cookielawinfo-checkbox-necessary
11 months
This cookie is set by GDPR Cookie Consent plugin. The cookies is used to store the user consent for the cookies in the category "Necessary".
cookielawinfo-checkbox-others
11 months
This cookie is set by GDPR Cookie Consent plugin. The cookie is used to store the user consent for the cookies in the category "Other.
cookielawinfo-checkbox-performance
11 months
This cookie is set by GDPR Cookie Consent plugin. The cookie is used to store the user consent for the cookies in the category "Performance".
viewed_cookie_policy
11 months
The cookie is set by the GDPR Cookie Consent plugin and is used to store whether or not user has consented to the use of cookies. It does not store any personal data.