Loads, Feeder & Eater
The feeder and eater are two elements of a model that are closely connected. The feeder produces loads while the eater ‘eats’ the loads so they disappear from the model again. Read more about them beneath.
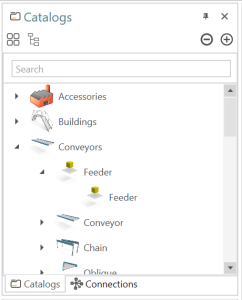
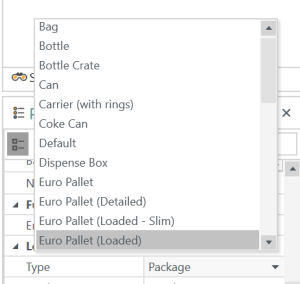
As mentioned above, the feeder produces loads. Loads represent any product the model is designed to handle, for instance luggage, boxes or trays. If you double click a conveyor, it will produce a load. However, if you want to produce several loads, you will need to use a feeder. In the Physics mode, you can find the feeder in the Experior catalog under conveyors:
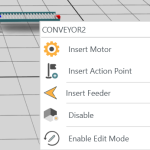
In the Discrete Events mode you can find the feeder in the demo catalog. From the catalog you can double click the feeder and place it in the scene. Alternately you can right click on a conveyor you wish to add the feeder to, and choose the ‘insert feeder’ option.
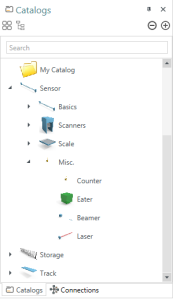
The eater only exists in Physics mode. You will find it under the sensor catalog>misc.>eater:
When a load hits the eater, the load will get ‘eaten’ and disappear. In the properties window you can see the properties for your eater and change its size, visibility etc.
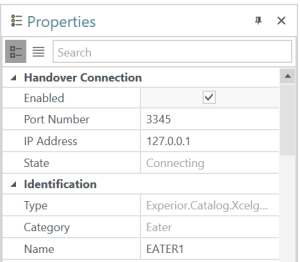
It is possible to link an eater and a feeder to each other. For instance if you have build only parts of your model but still miss some functions, you can set it up so an eater eats the loads in one part of the model and then sends them directly to the feeder in another part of the model, making it possible to circumvent the part of the model, you have not yet build. If you wish to do this, you must go to the properties window of both the feeder and the eater in turn and enable the handover connection box:
You also have to make sure that the port-numbers are a match and the computer does not already use this port – otherwise you will not be able to connect the two. When you have chosen matching port-numbers, that are not already in use, the feeder and eater will connect.
If you wish to connect a feeder and an eater that are not on the same device – for instance you have part of the model open on your computer, your colleague has another on his – it is possible to do so as well. You just need to make sure that the IP address in the properties for the eater matches the IP address of the device, the feeder is on. Then you can connect them.
| Cookie | Duration | Description |
|---|---|---|
| cookielawinfo-checkbox-analytics | 11 months | This cookie is set by GDPR Cookie Consent plugin. The cookie is used to store the user consent for the cookies in the category "Analytics". |
| cookielawinfo-checkbox-functional | 11 months | The cookie is set by GDPR cookie consent to record the user consent for the cookies in the category "Functional". |
| cookielawinfo-checkbox-necessary | 11 months | This cookie is set by GDPR Cookie Consent plugin. The cookies is used to store the user consent for the cookies in the category "Necessary". |
| cookielawinfo-checkbox-others | 11 months | This cookie is set by GDPR Cookie Consent plugin. The cookie is used to store the user consent for the cookies in the category "Other. |
| cookielawinfo-checkbox-performance | 11 months | This cookie is set by GDPR Cookie Consent plugin. The cookie is used to store the user consent for the cookies in the category "Performance". |
| viewed_cookie_policy | 11 months | The cookie is set by the GDPR Cookie Consent plugin and is used to store whether or not user has consented to the use of cookies. It does not store any personal data. |