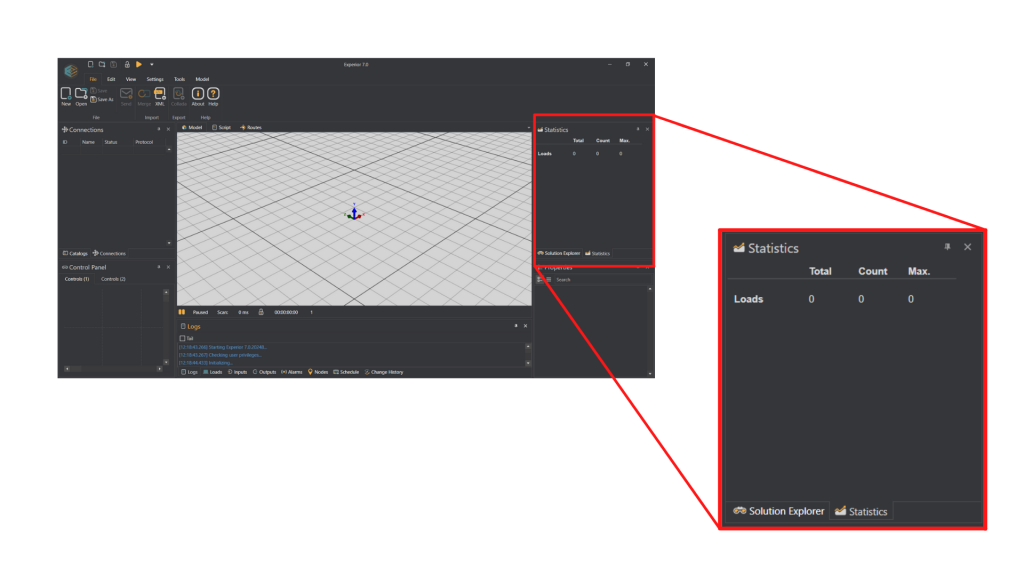
When the Experior layout is set to default mode, you will find the Solution Explorer and Statistics window on the top right side of the screen. This window has a few different functions:
The Solution Explorer contains a tree structure that lets you see every assembly you have placed onto the model floor. It has three different categories: assemblies, motors and controllers. Assemblies is sorted into sections which then shows each assembly that section contains. In the Solution Explorer you can get a quick overview of every single thing, you have placed. If you click on any of them, the model will highlight that assembly for you. You can move assemblies between different sections by dragging them into another section tab or by choosing the assembly you want to move and then changing the section it is placed under in the properties window. You can rename sections by clicking on the section and then change the name in the properties window.
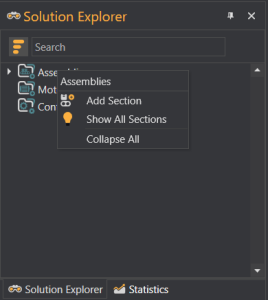
If you right click on the assemblies tab, you will see a menu that looks like this:
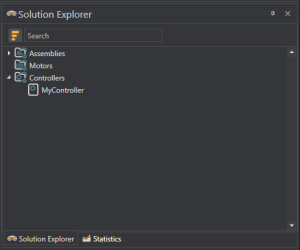
In the menu you can choose to add a section or show all sections. You can also Collapse All which will close all the subcategories you have open. If you right click on the motors tab (motor tab is only available in Physics Mode), you will also be able to collapse all. Right clicking on the controllers tabs will open a menu which says ‘Load’. Here you can load a controller file (.DLL format) into Experior. When the controller is loaded it shows up in the Solution Explorer window like this:
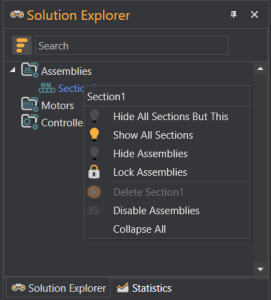
If you open the assemblies menu and right click on the sections you will see a new menu:
HIDE ALL SECTIONS BUT THIS: See only this section SHOW ALL SECTIONS: See all the sections again HIDE ASSEMBLIES: Hides all assemblies as well as the floor of that section LOCK ASSEMBLIES: Locks every assembly you have placed up to that point but does not not lock new assemblies you place FIT: Resizes the floor to fit around the assemblies placed in the model DELETE (Name): Delete the chosen section. It is not possible to delete the last section to have no sections DISABLE ASSEMBLIES: When you disable the assemblies of a section all the assemblies placed in that section will turn gray to show they are disabled. When you for example place a load on a disabled assembly it will fall trough the assembly when you start the model... To enable the section again just press… COLLAPSE ALL: Collapses the tree hierarchy
If you right click on one of the assemblies in the assemblies tab, you will have the choice to either disable the assembly or delete it. If you right click on a motor you will have the choices to start the motor, copy it, disable it or delete it.
The solution explorer window also has a few more options to individualize the window. In the right corner you will see a small tack which will allow you to ‘auto hide’ the window. Pressing this will place the window as a bar just below the Machine Expert Twin menu like this:
To reset it go to the View menu and press reset. Below the tack is a search bar where you can search for any assembly or motor you have placed on the model floor and next to that is a button with three lines that will let you choose whether or not you want to see the assemblies assorted into categories.
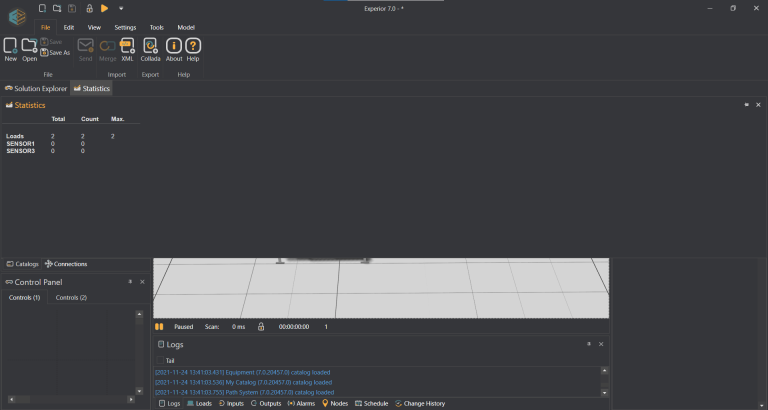
2. Statistics
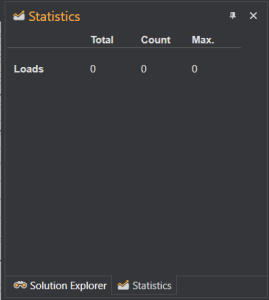
The statistics window displays information about the loads in the model:
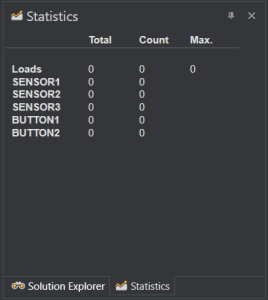
You can get information from a specific sensor or button by adding it to the statistics window. To do this you right click on the sensor you want to display and choose ‘Observe’. Now the sensor shows up in the statistics display under the Loads line:
You can observe different types of sensors, scanners, weights, counters and eaters. The scanners will show information about how many loads they have scanned, while the buttons show how many times they have been pressed.
If you want to change the name of any of the sensors just click on the sensor in the model and its information will show up in the properties window. From here you can change the name. To display the new name simply right click the sensor, uncheck ‘Observe’ and check it again. Now the sensor should show up in the statistics window with its new name.
We use cookies on our website to give you the most relevant experience by remembering your preferences and repeat visits. By clicking “Accept All”, you consent to the use of ALL the cookies. However, you may visit "Cookie Settings" to provide a controlled consent. You can view our policy on privacy and use of cookies in the privacy policy tab found in the bottom of the site
This website uses cookies to improve your experience while you navigate through the website. Out of these, the cookies that are categorized as necessary are stored on your browser as they are essential for the working of basic functionalities of the website. We also use third-party cookies that help us analyze and understand how you use this website. These cookies will be stored in your browser only with your consent. You also have the option to opt-out of these cookies. But opting out of some of these cookies may affect your browsing experience.
Necessary cookies are absolutely essential for the website to function properly. These cookies ensure basic functionalities and security features of the website, anonymously.
Cookie
Duration
Description
cookielawinfo-checkbox-analytics
11 months
This cookie is set by GDPR Cookie Consent plugin. The cookie is used to store the user consent for the cookies in the category "Analytics".
cookielawinfo-checkbox-functional
11 months
The cookie is set by GDPR cookie consent to record the user consent for the cookies in the category "Functional".
cookielawinfo-checkbox-necessary
11 months
This cookie is set by GDPR Cookie Consent plugin. The cookies is used to store the user consent for the cookies in the category "Necessary".
cookielawinfo-checkbox-others
11 months
This cookie is set by GDPR Cookie Consent plugin. The cookie is used to store the user consent for the cookies in the category "Other.
cookielawinfo-checkbox-performance
11 months
This cookie is set by GDPR Cookie Consent plugin. The cookie is used to store the user consent for the cookies in the category "Performance".
viewed_cookie_policy
11 months
The cookie is set by the GDPR Cookie Consent plugin and is used to store whether or not user has consented to the use of cookies. It does not store any personal data.